Publishing your contract
Run the following command in the same directory as your contract
npx thirdweb publish
This does a few things in the background
- Compiles your smart contract.
- Uploads the contract source code (ABI) to IPFS.
- Opens the publish flow in the dashboard.
Open the generated URL in your browser and follow the steps below to publish your contract.
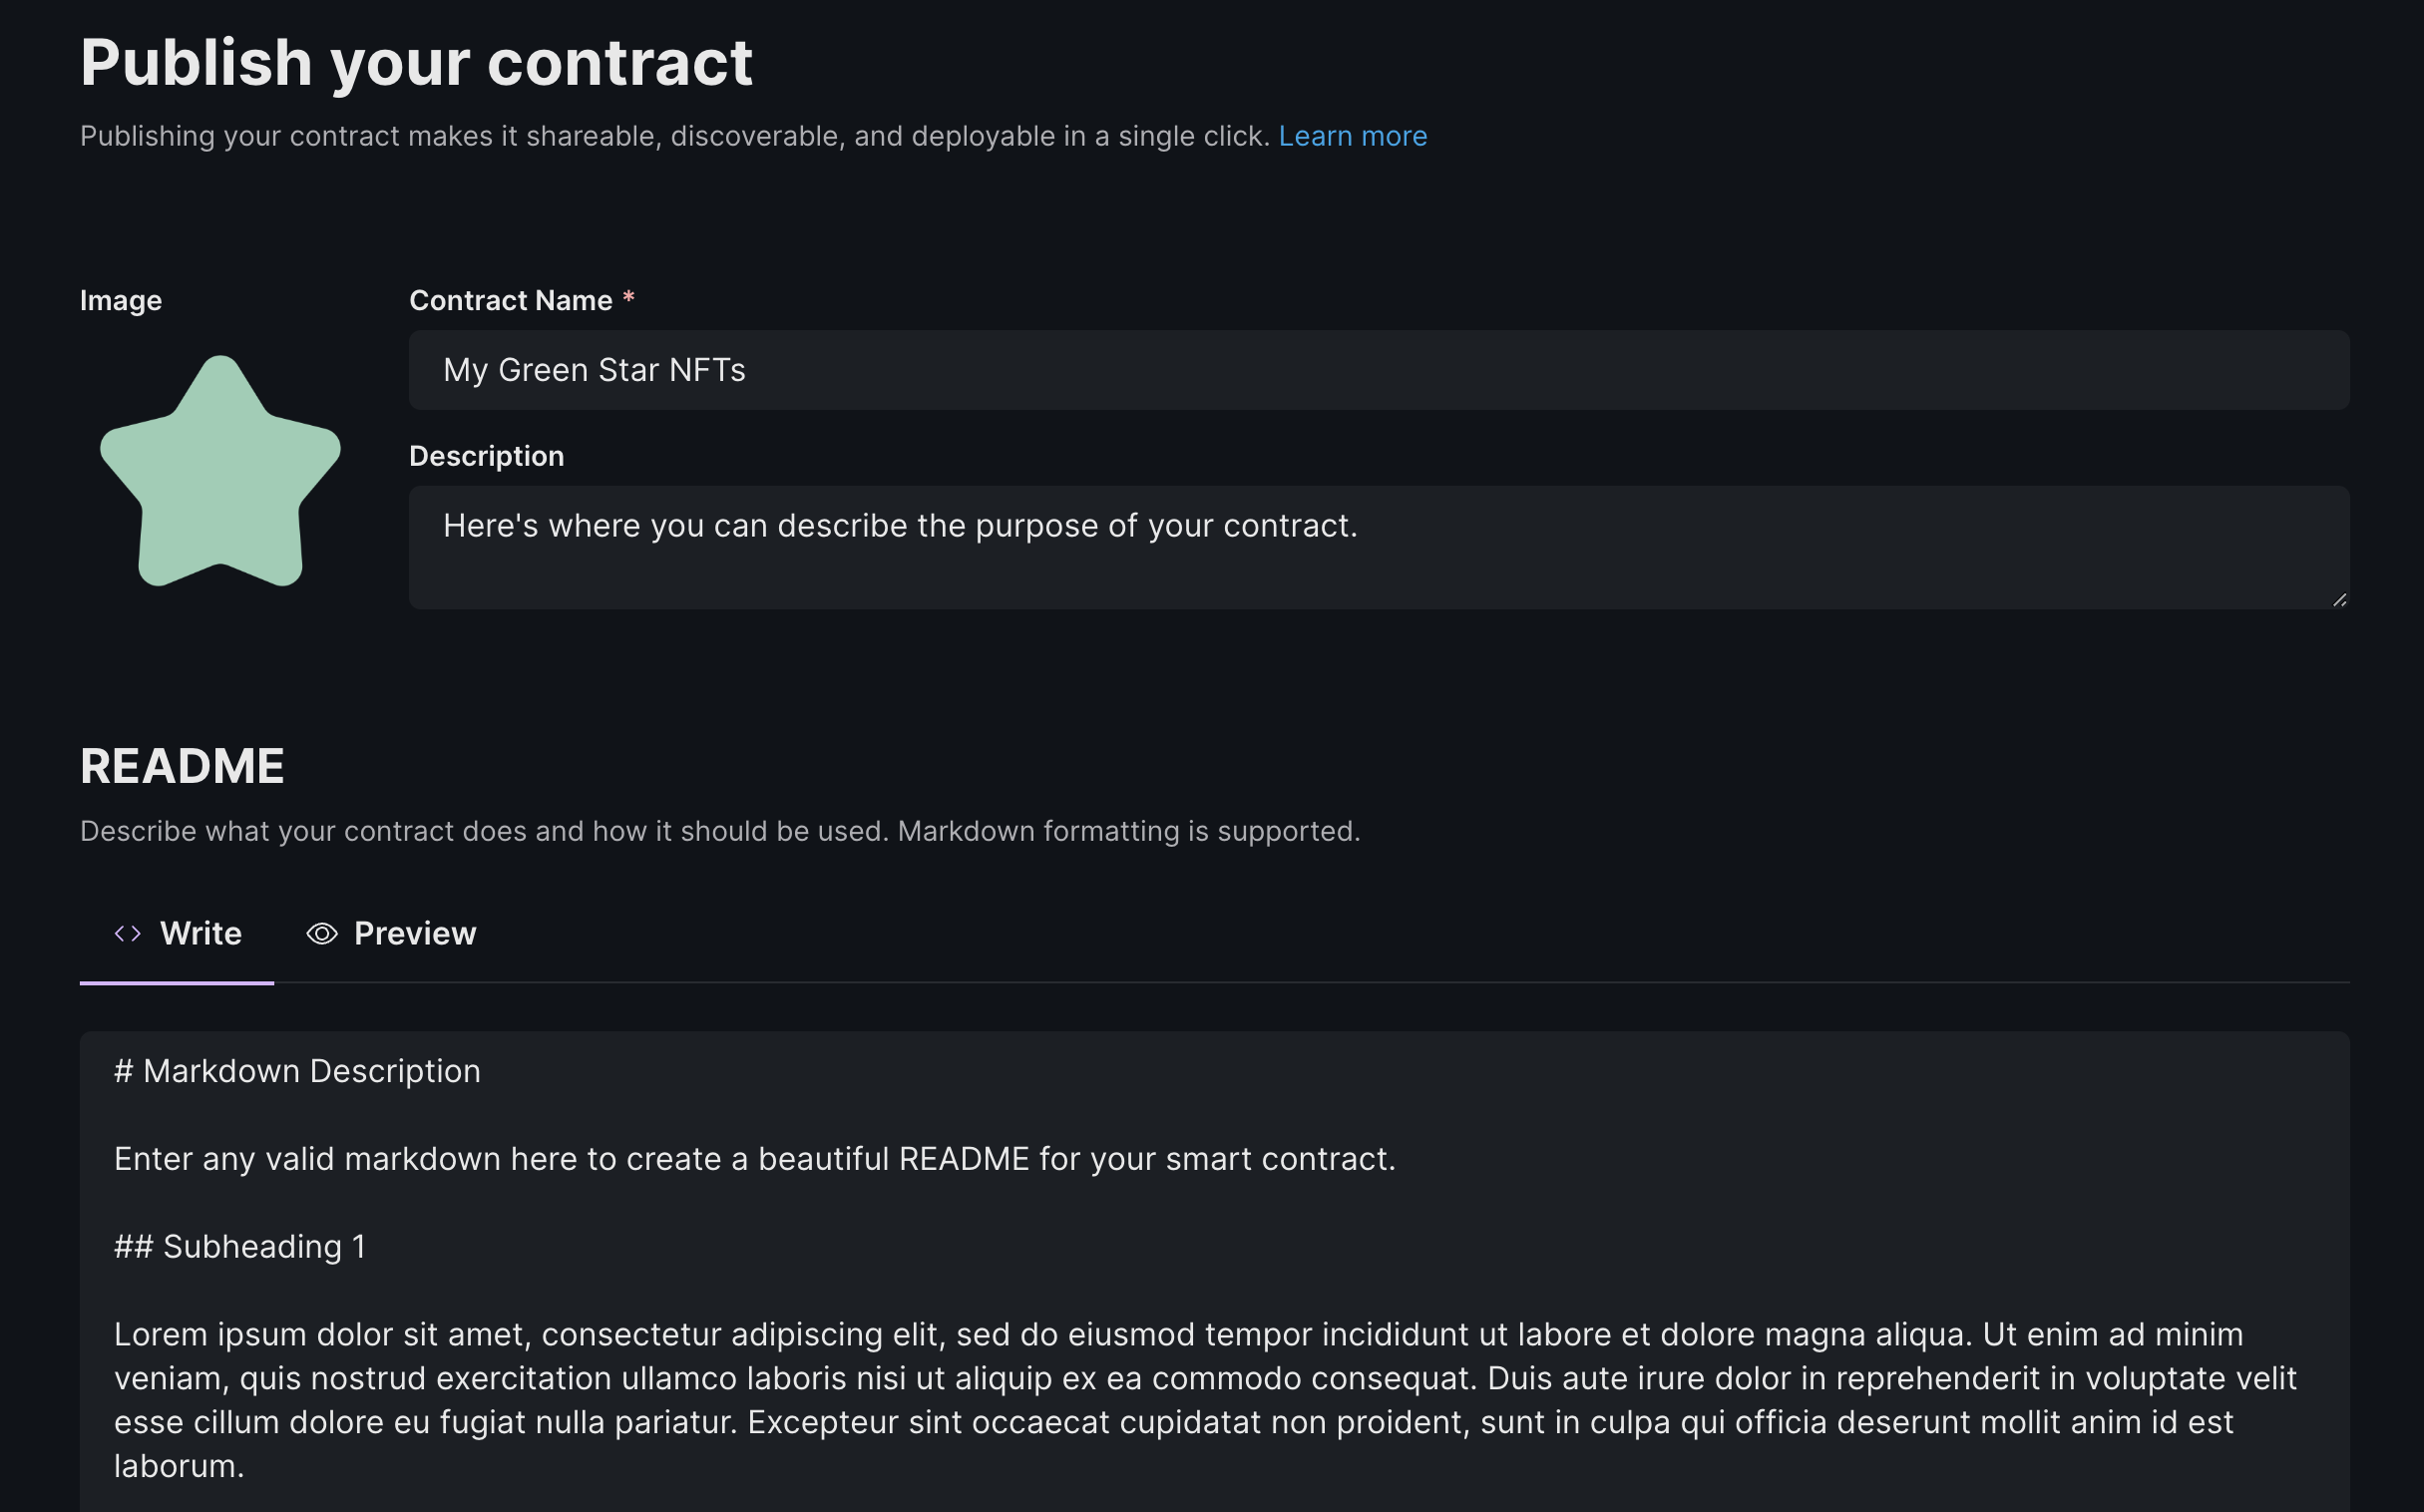
Configure Contract Metadata
From the dashboard, provide metadata about your smart contract such as a name, image, description and more.
This information is what users will see when they visit your smart contract from the Explore page.

Add A Version
Use semantic versioning to incrementally publish new versions of your smart contract; ideal for when you want to make changes to your smart contract but don't want to break existing integrations.
Each version of your smart contract is stored on-chain and can be deployed by anyone. You can optionally include release notes to describe the changes you've made between versions.
You can also link each version to an audit report. You can paste a link to it, or drag and drop a PDF. We will generate a IPFS link for you.

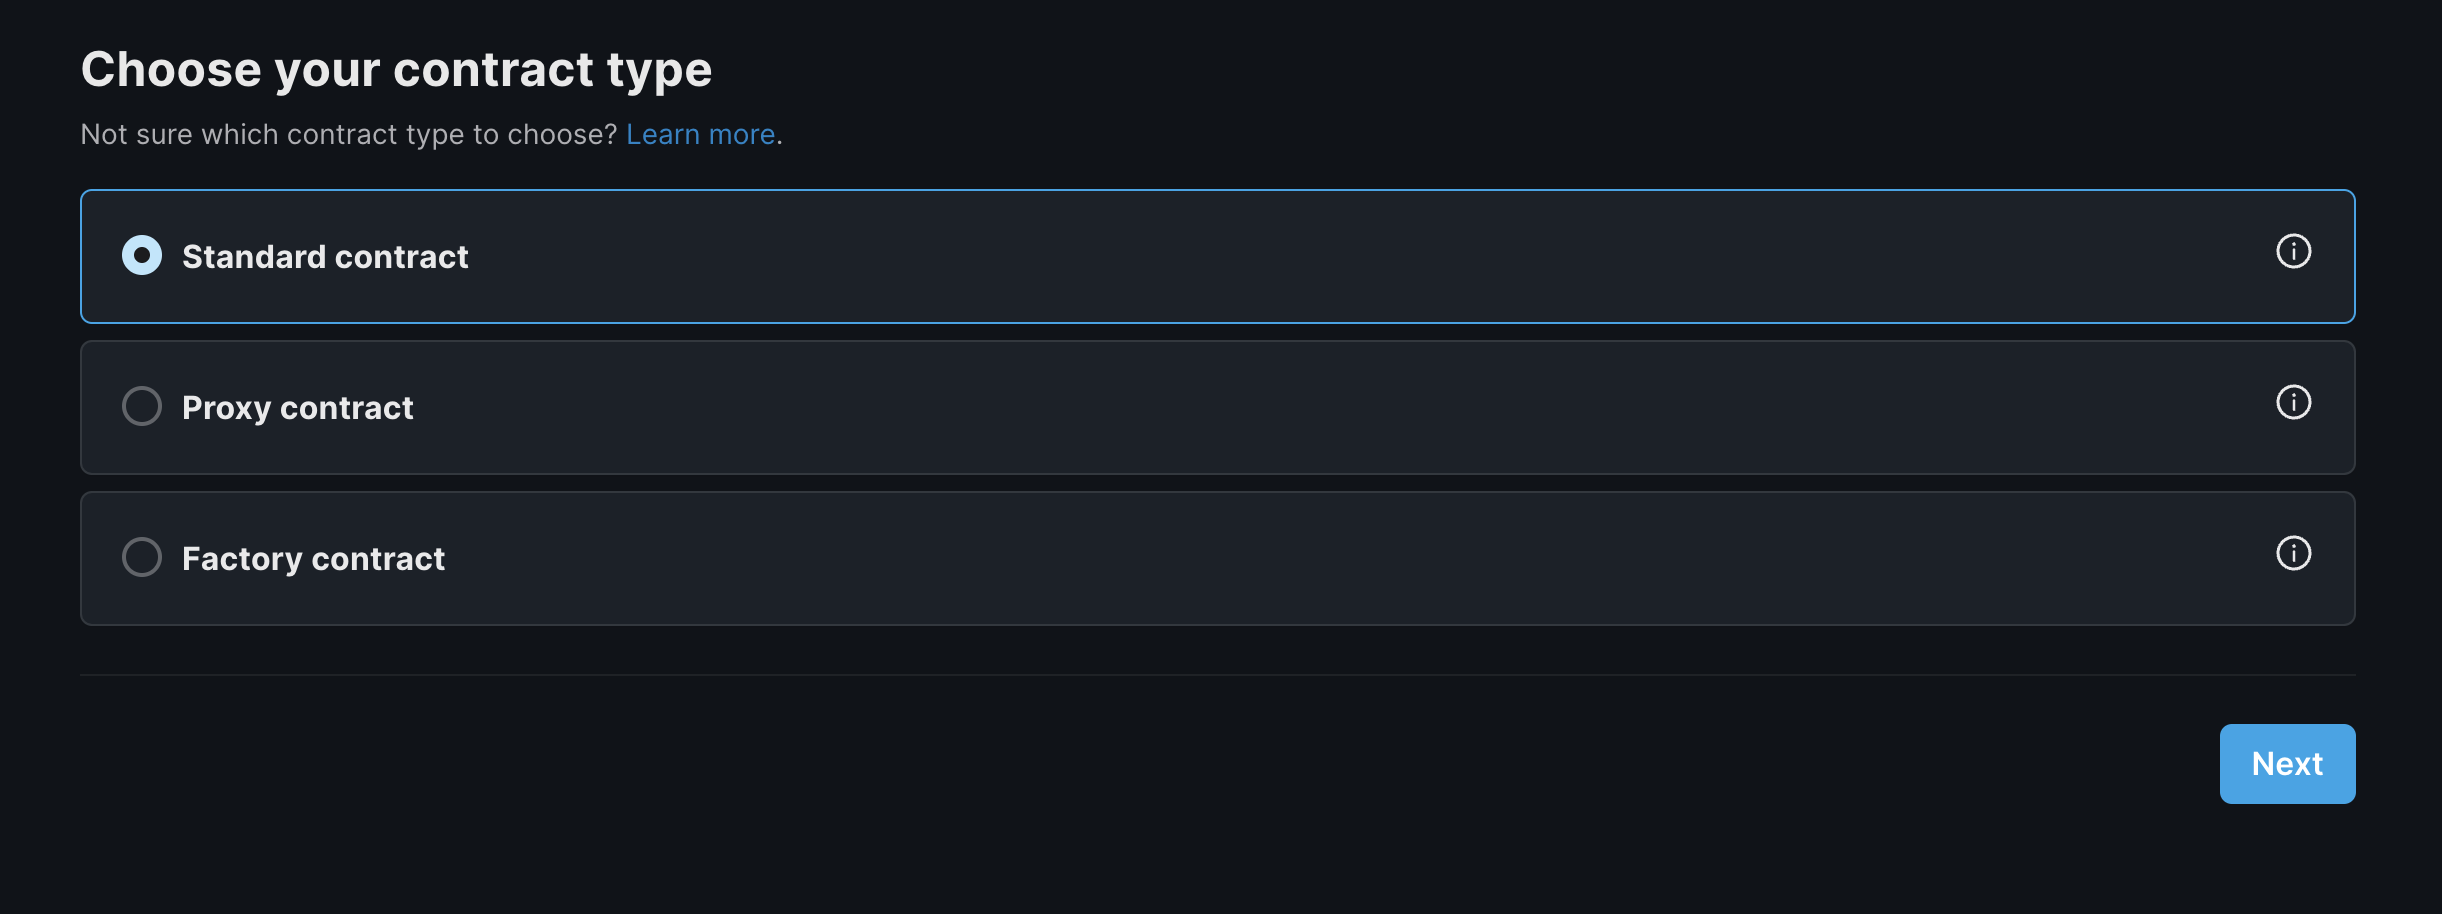
Choose your Contract Type
Select the contract type for your published contract. Choose the "standard contract" option (selected by default) if your contract does not follow the proxy or factory contract patterns. Proxy contracts let your published contracts have cheaper deploys, and factory contracts let you invoke a factory function when the contract gets deployed. Learn more about proxy contracts here and factory contracts here.

Once selected, click "Next" to move on to flow corresponding to the contract type selected.
Customize Contract Parameters
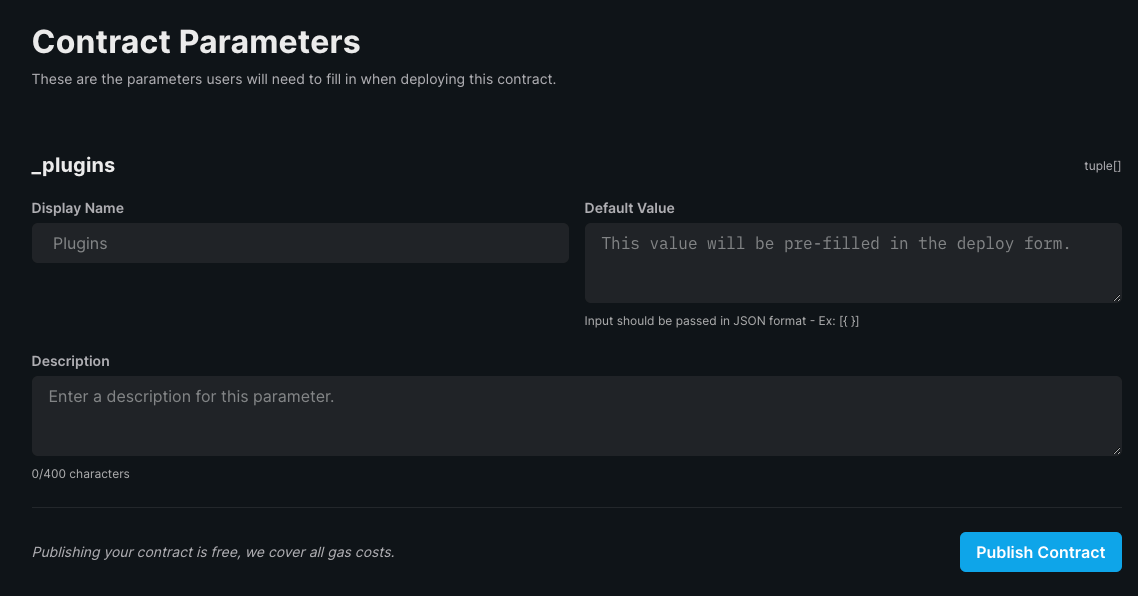
Help users trying to deploy your smart contract by changing what your contract parameters look like. These are fields that users need to enter before deploying your contract with each field corresponding to the associated variable in the constructor of your contract.
- Display name: Use this to have a more readable version of the paramter name. Otherwise, the parameter name from the contract will be shown as is.
- Default value: This will be pre-filled in the deploy form. Use this to guide users on what value to enter. If the parameter is of the address datatype, you can pre-fill the users connected wallet address by setting the default value as {{connected_wallet}}
- Description: Use this to clear up any confusion and explain what value this parameter is expecting

Publish Contract
Finally, click the "Publish Contract" button to publish your smart contract to the on-chain registry.
For best practices and getting your contract on Explore, refer to this page.